Summary of our Workshop clinics and tips.
Sign up for clinics news below. Here we are going to summarize several of the popular subjects. Did you know there is a right and wrong way to put air in a tubeless tire? Can you change a flat? Ever wonder how some cyclist ride deep into winter without freezing? Maybe you would like to learn how the pros wash their bikes. We can help and this page is dedicated to tips from SDC.
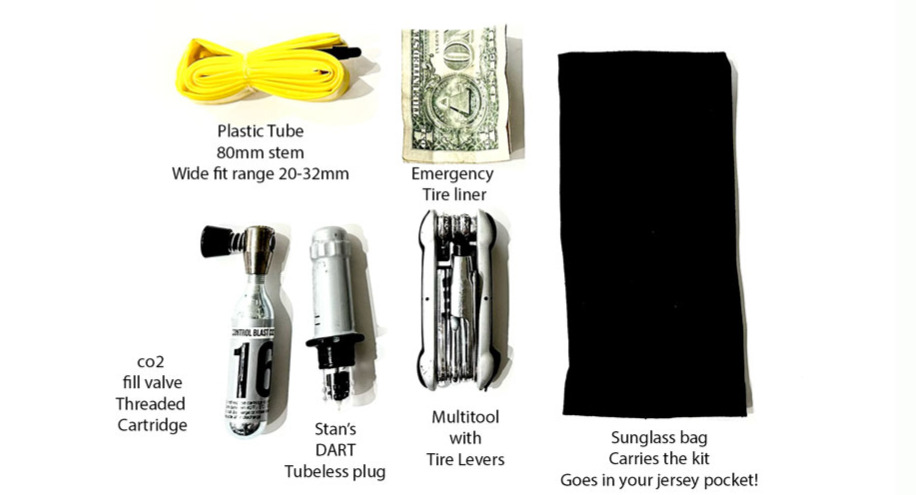
Flat repair kit
We are not fans of saddle bags on cool bikes. This is the tool kit we carry on road and gravel bikes. And a similar kit in our Camelbak on mountain bike rides. Small, efficient and rarely needed with tubeless set ups. Find out more from our clinics, or visit the shop!
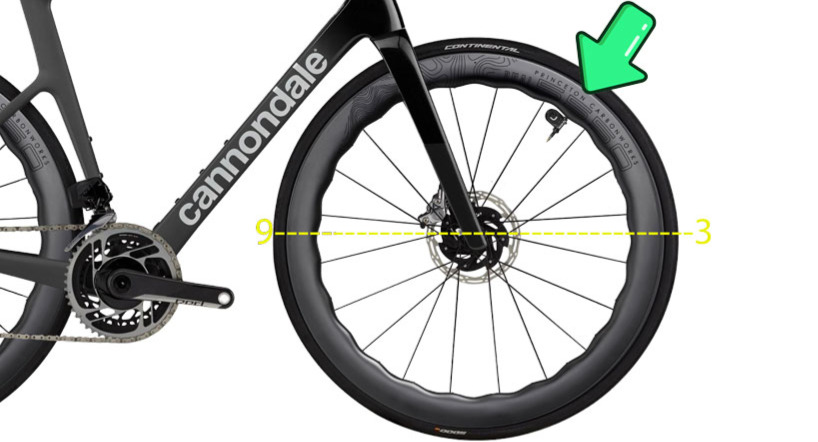
Quick Tubeless Tips
1. Tubeless sealant dries out, refresh 1-2 times a year.
2. Fill or remove air above 3 and 9 o'clock, so you don't affect the sealant or suck it out of the valve which will lead to clogs.
3. Various tire pressure calculators can guide you. Lower is faster and more comfortable, a prime reason to go tubeless.
4. A bad slash can be repaired in the field by removing the valve, inserting a tube and using a dollar bill as a barrier between slash in tire and the tube otherwise the friction will pop tube quickly.
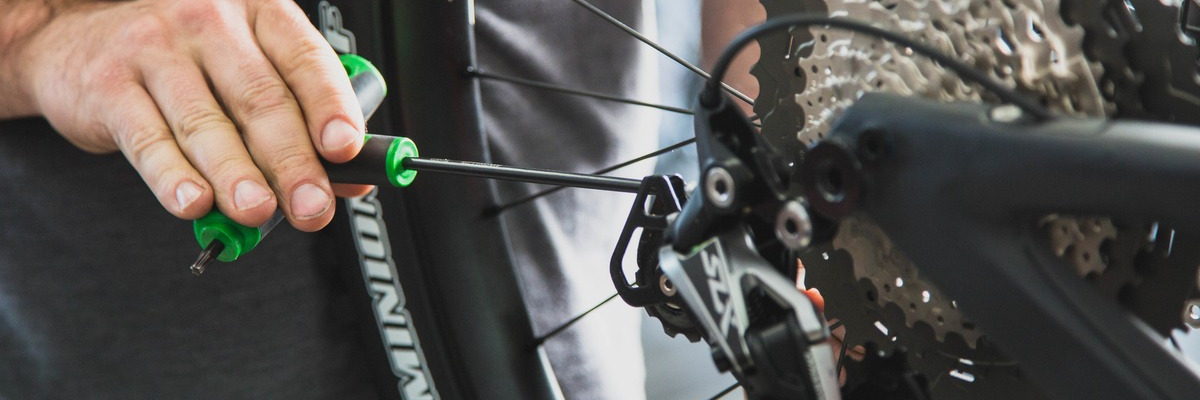
Changing an inner tube
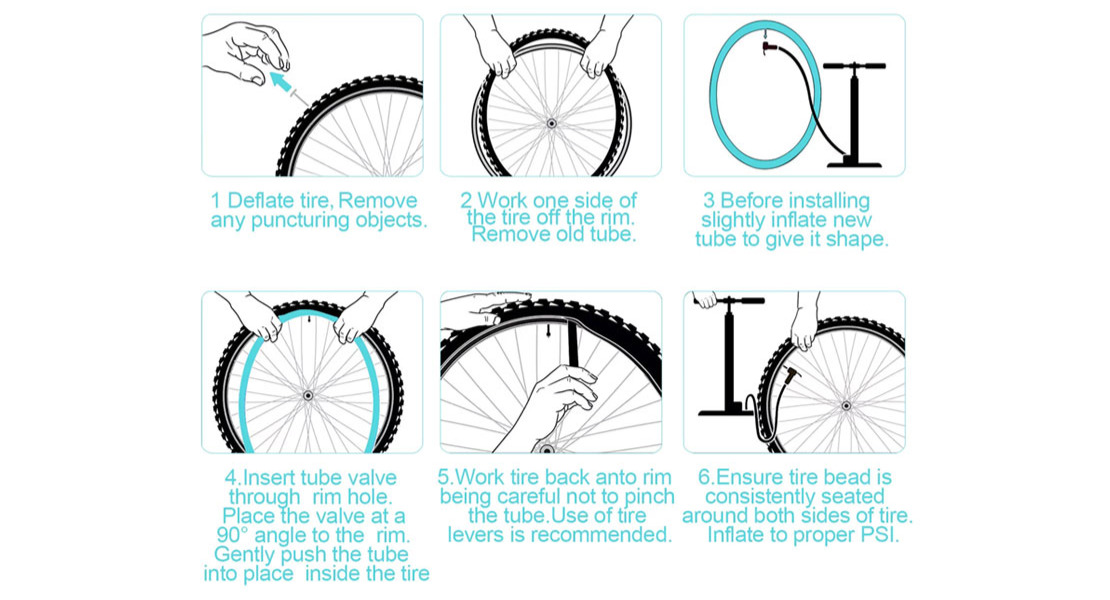
Here are the steps to change a bicycle inner tube:
- Remove the wheel from the bike.
- Using bike tire levers, pry one side of the tire off the rim. This breaks the bead seal between the rim and tire. Work the tire levers around the rim, prying the whole tire off.
- Inflate the new replacement inner tube just enough to barely give it some shape.
- Insert the new tube inside the tire, being careful not to twist it. Use your hands to coax the whole tube evenly into the tire casing all the way around. If the tire is damaged internally a dollar bill or tire liner needs to be placed between the tube and tire or it will pop the tube.
- Press one side of the tire onto the rim edge. Working your way around both sides, fit the tire back onto the wheel rim using your hands only.
- Re-inflate the tube enough so that the tire takes proper shape again. Make sure the tube is seated evenly under the tire. Inflate to your desired pressure. It is critical to make sure the tire beads set evenly all around the rim.
- Inflate to your desired pressure. Reinstall tire.
Riding Gear for Colder Weather
Everyone is different with different tolerance for cold. Feet and hands are critical to comfort. We find the outfit combinations don't change but your comfort zone will depend on where you get your heart rate and personal tolerance. Maybe you can get away with our 40F gear at 35F. But years of use in the same cold weather pieces give us a pretty good baseline to make suggestions. Always look at the wind and the 'feels like' temps. 15F, sun and low wind can still be a wonderful two hour ride, which beats riding a trainer any day :)
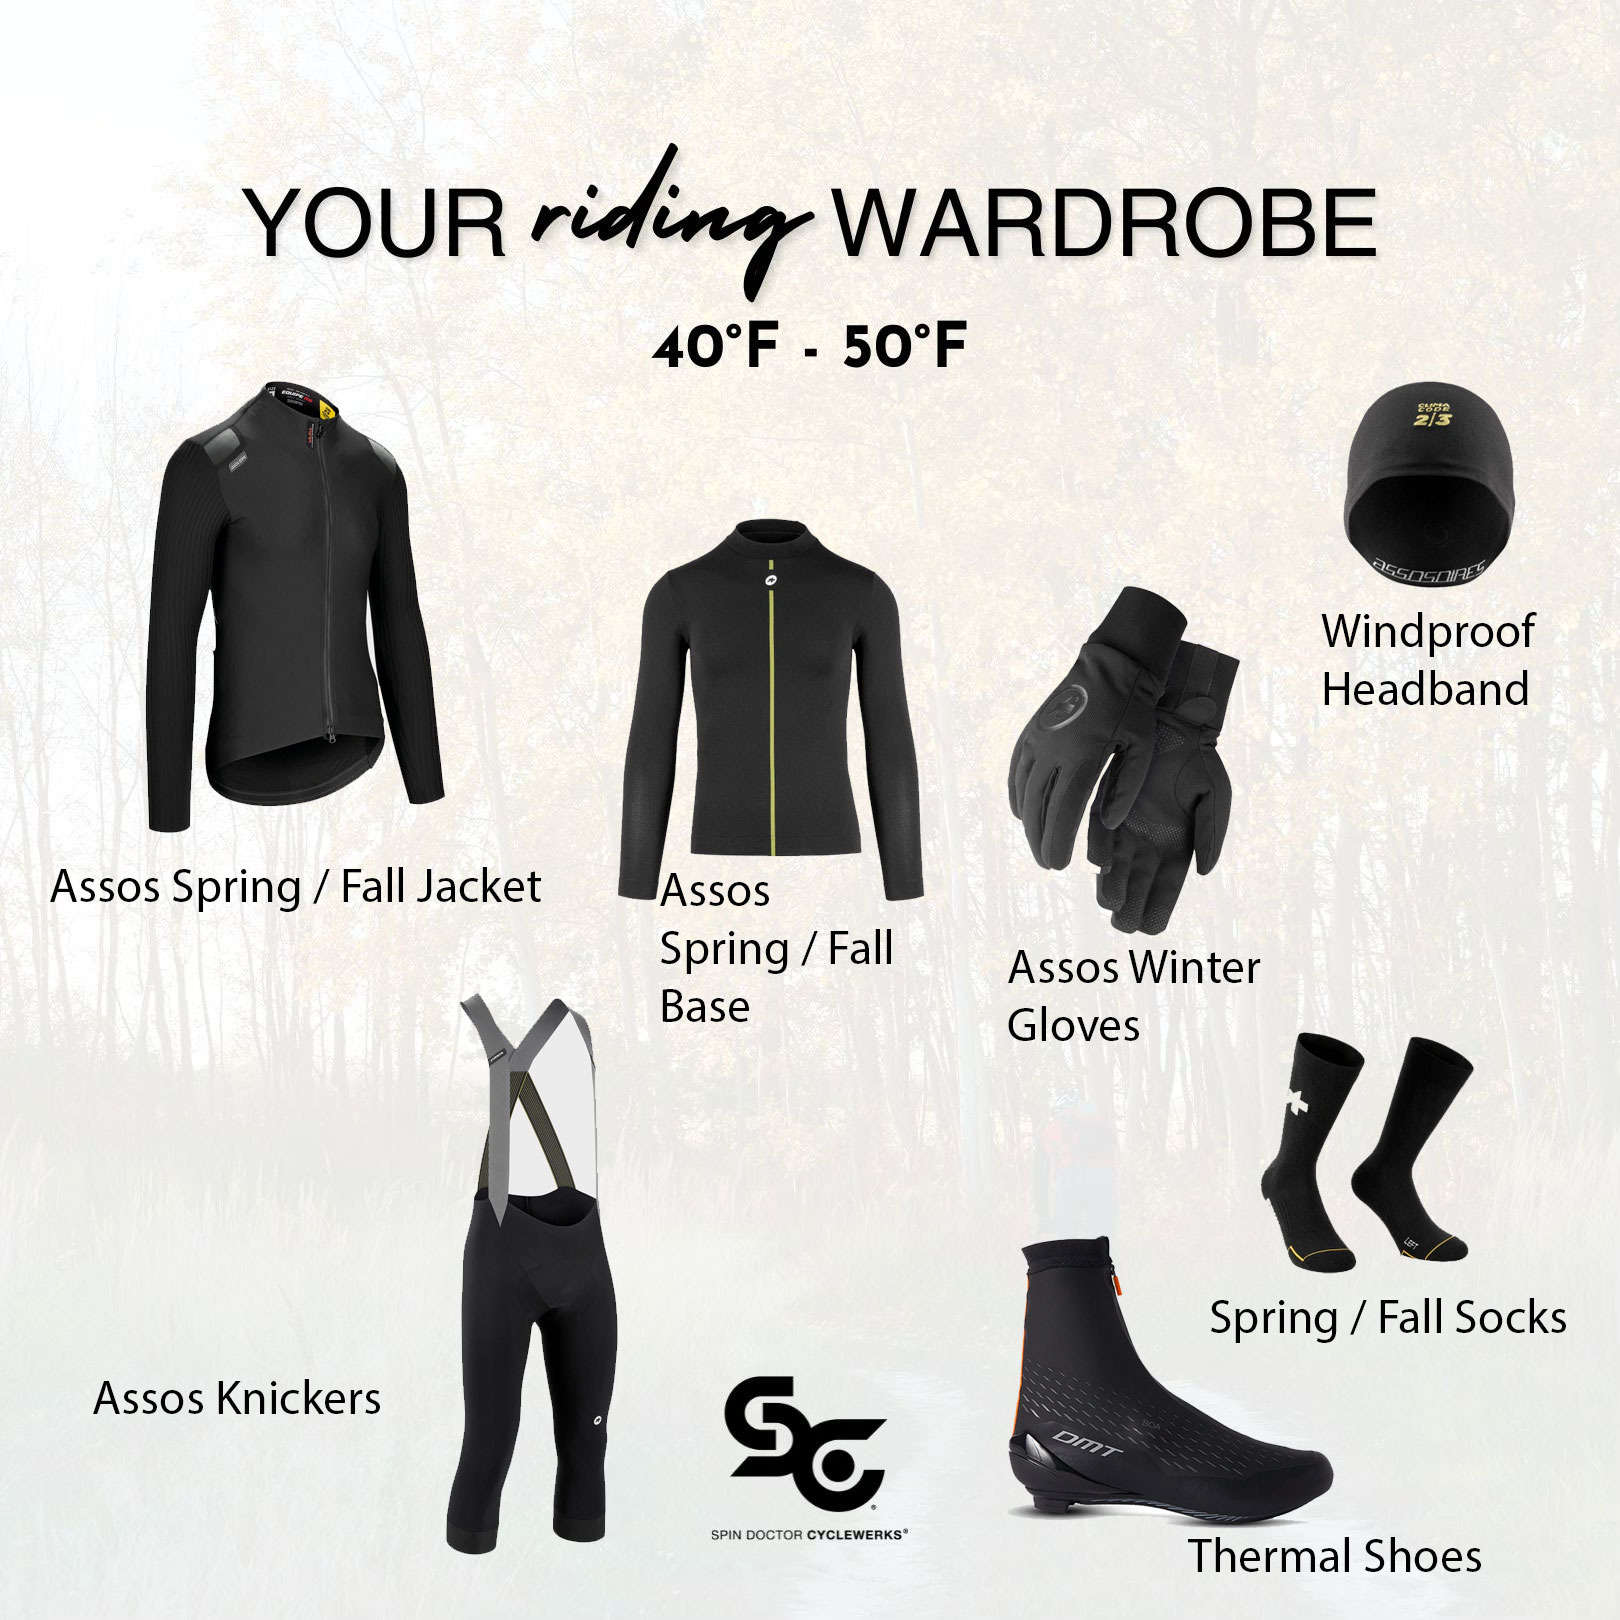
40-50
When the ride will end between 40-50F this is our go to gear.
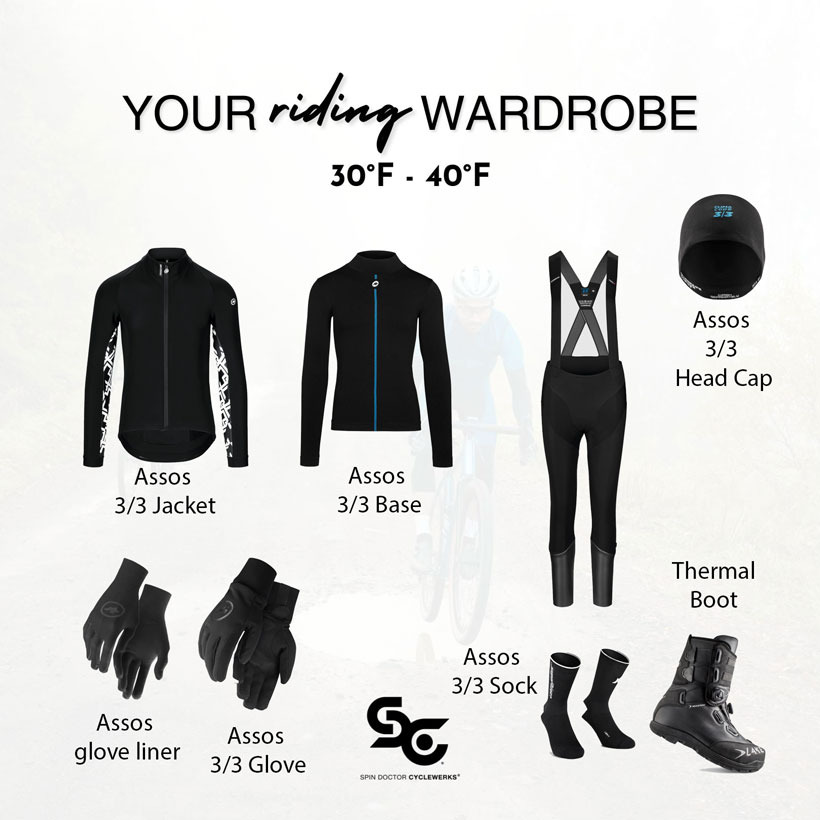
30-40
Sun is out and winds below 15mph? Let's roll!

20-30
Ok, it is getting brisk and the rides may be more selective. But the bike paths are pretty much all yours and that satisfaction is hard to replicate.
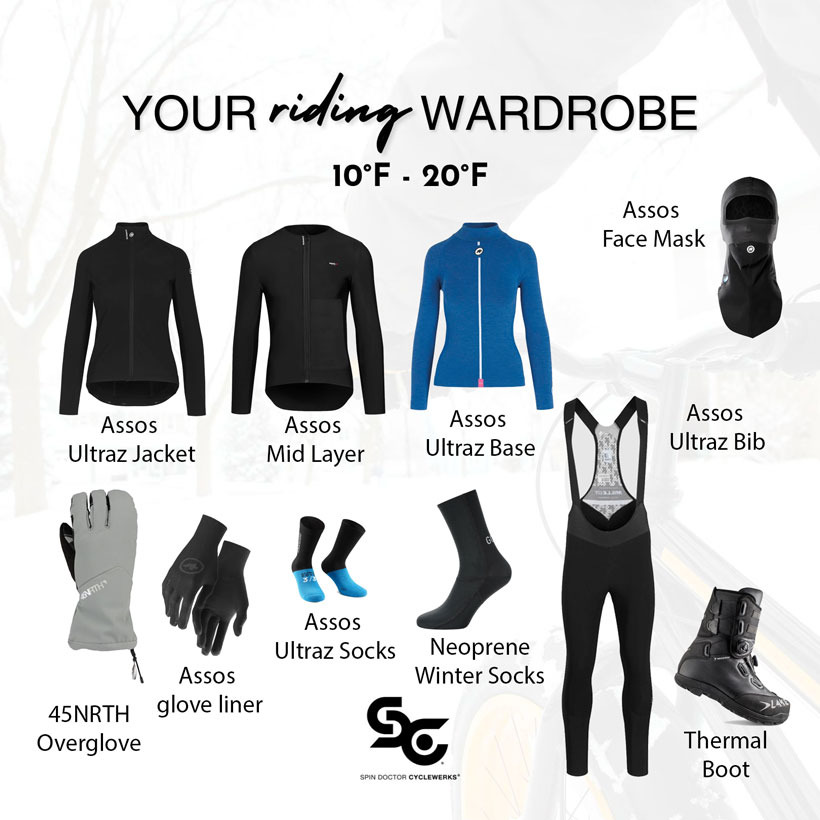
10-20
Proper cold. The gear may cost more than your bike, but even a once a week ride in January is better than none!
Learn more...
Sign up for our free clinics where we can dive deep and have some fun. Be the first to know by signing up below. Add events to your calendar so you don't miss out. While we will generally have sign up via Facebook events if you don't Facebook, just send us an email to hold a spot.